Click for large image

1_Jamie_Day_warms_up.jpg

1 Jamie Day warms up.jpg

Click for large image

2_The_fans_sample_the_Harlow__hospitality_.jpg

2 The fans sample the Harlow 'hospitality'.jpg

Click for large image

3_Would_you_trust_this_lot.jpg

3 Would you trust this lot.JPG

Click for large image

4_Let_the__Battle_of_the_Drums__commence.jpg

4 Let the 'Battle of the Drums' commence.jpg

Click for large image

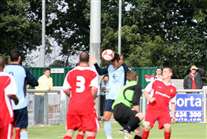
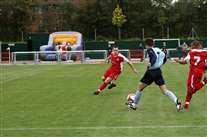
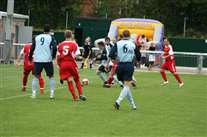
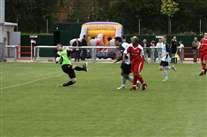
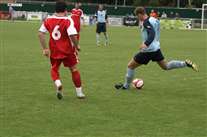
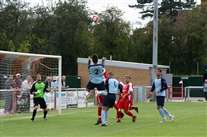
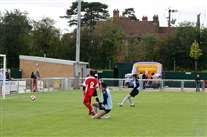
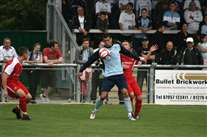
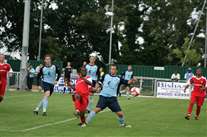
5_Rob_with_his_first_start_gets_involved_early_on.jpg

5 Rob with his first start gets involved early on.jpg

Click for large image

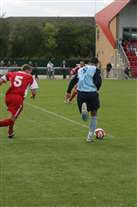
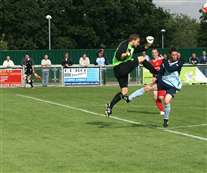
6_Butters_had_the_pace_of_the_defence_sussed.jpg

6 Butters had the pace of the defence sussed.jpg

Click for large image

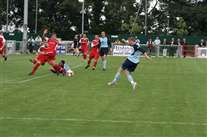
7_Into_the_area_but_the_defender_manages_to_block_it.jpg

7 Into the area but the defender manages to block it.jpg

Click for large image

8_Jamie_D_shows_some_frustration.jpg

8 Jamie D shows some frustration.jpg

Click for large image

9_Daffy_gets_up_for_the_ball...jpg

9 Daffy gets up for the ball...jpg

Click for large image

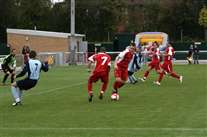
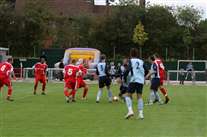
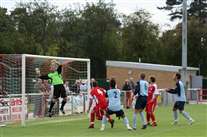
10_Lee_manages_to_control_it_in_the_packed_area.jpg

10 Lee manages to control it in the packed area.jpg

Click for large image

11_..turns_and_readys_the_chip...jpg

11 ..turns and readys the chip...jpg

Click for large image

12_..the_keeper_flaps_at_it_first_time...jpg

12 ..the keeper flaps at it first time...jpg

Click for large image

13_..but_then_safely_gathers_it_in.jpg

13 ..but then safely gathers it in.jpg

Click for large image

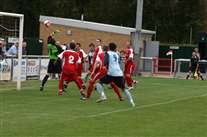
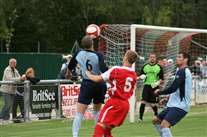
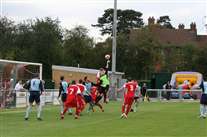
14_Adam_and_John_rise_to_meet_Jamie_D_s_corner.jpg

14 Adam and John rise to meet Jamie D's corner.jpg

Click for large image

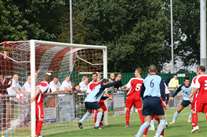
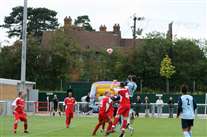
15_The_defender_tries_the_clearance_but_it_s_straight_at_the_players.jpg

15 The defender tries the clearance but it's straight at the players.jpg

Click for large image

16_..Rob_connects_and_sends_it_goalward...jpg

16 ..Rob connects and sends it goalward...jpg

Click for large image

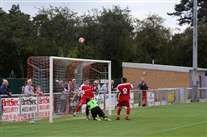
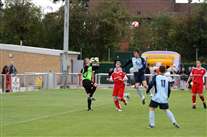
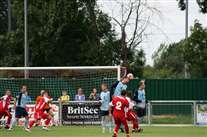
17_.._only_to_see_it_go_over_the_bar_with_the_keeper_beaten.jpg

17 .. only to see it go over the bar with the keeper beaten.jpg

Click for large image

18_Keeper_jumps_and_fails_to_connect_again.jpg

18 Keeper jumps and fails to connect again.jpg

Click for large image

19_Lee_collects_the_ball_and_sends_it_through_the_middle_to_Ray.jpg

19 Lee collects the ball and sends it through the middle to Ray.jpg

Click for large image

20_..who_gets_behind_the_defenders_and_hits_it.....jpg

20 ..who gets behind the defenders and hits it.....jpg

Click for large image

21_..the_keeper_had_no_chance_1-0.jpg

21 ..the keeper had no chance 1-0.jpg

Click for large image

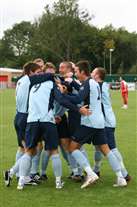
22_The_players_celebrate_the_first_goal_of_the_season.jpg

22 The players celebrate the first goal of the season.jpg

Click for large image

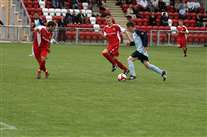
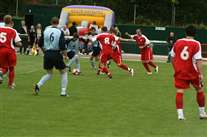
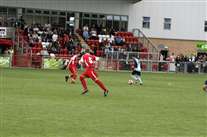
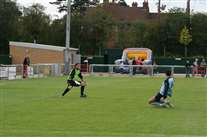
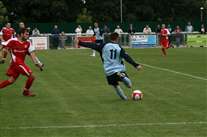
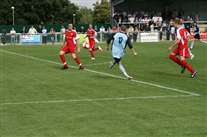
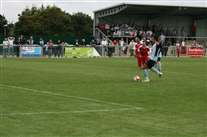
23_Lee_taking_another_opportunity_to_run_at_the_defence.jpg

23 Lee taking another opportunity to run at the defence.jpg

Click for large image

24_but_the_defender_manages_to_get_a_foot_to_the_ball.jpg

24 but the defender manages to get a foot to the ball.jpg

Click for large image

25_Richard_send_the_ball_over...jpg

25 Richard send the ball over...jpg

Click for large image

26_.._but_the_keeper_beats_Butters_and_Ray_to_it.jpg

26 .. but the keeper beats Butters and Ray to it.jpg

Click for large image

27_Ray_tries_to_get_past_the_defender.jpg

27 Ray tries to get past the defender.jpg

Click for large image

28_Lee_hits_a_rocket_but_it_s_just_wide.jpg

28 Lee hits a rocket but it's just wide.jpg

Click for large image

29_Jamie_C_jumps_for_the_ball...jpg

29 Jamie C jumps for the ball...jpg

Click for large image

30_..and_it_scares_the_keeper_but_it_s_over.jpg

30 ..and it scares the keeper but it's over.jpg

Click for large image

31_The__packed__covered_terrace.jpg

31 The 'packed' covered terrace.jpg

Click for large image

32_Ray_squares_the_ball_for_Butters_....jpg

32 Ray squares the ball for Butters ....jpg

Click for large image

33_Butters_puts_it_away_but_it_s_ruled_offside.jpg

33 Butters puts it away but it's ruled offside.jpg

Click for large image

34_Ray_was_called_for_defensive_duties_too.jpg

34 Ray was called for defensive duties too.jpg

Click for large image

35_Tony_safely_gathers_the_free_kick_in.jpg

35 Tony safely gathers the free kick in.jpg

Click for large image

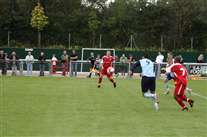
36_2nd_half_and_Lee_still_giving_the_defence_problems.jpg

36 2nd half and Lee still giving the defence problems.jpg

Click for large image

37_Rob_being_closely_shadowed.jpg

37 Rob being closely shadowed.jpg

Click for large image

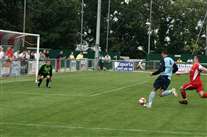
38_Lee_tries_one_from_the_corner_of_the_area.jpg

38 Lee tries one from the corner of the area.jpg

Click for large image

39_..and_the_keeper_watches_it_hit_the_crossbar.jpg

39 ..and the keeper watches it hit the crossbar.jpg

Click for large image

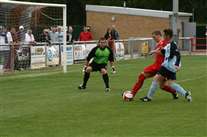
40_Lee_is_the_meat_in_the_sandwich_once_again.jpg

40 Lee is the meat in the sandwich once again.jpg

Click for large image

41_50-50_ball....jpg

41 50-50 ball....jpg

Click for large image

42_...but_the_keeper_gets_it.jpg

42 ...but the keeper gets it.jpg

Click for large image

43_Jamie_D_tries_to_chip_the_keeper....jpg

43 Jamie D tries to chip the keeper....jpg

Click for large image

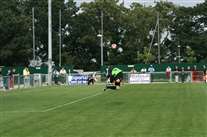
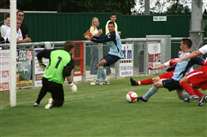
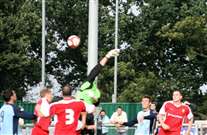
44_..but_the_keeper_manages_to_acrobatically_put_it_wide.jpg

44 ..but the keeper manages to acrobatically put it wide.jpg

Click for large image

45_Ray_tries_to_get_his_head_to_Lee_s_cross.jpg

45 Ray tries to get his head to Lee's cross.jpg

Click for large image

46_..Jamie_D_follows_and_and_hits_it_just_wide.jpg

46 ..Jamie D follows and and hits it just wide.jpg

Click for large image

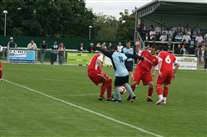
47_Ray_sets_himself_up_but_the_defender_gets_a_boot_there.jpg

47 Ray sets himself up but the defender gets a boot there.jpg

Click for large image

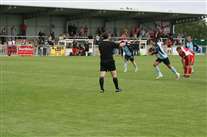
48_Jamie_C_runs_up_to_take_the_penalty_while_the_ref_watches_the_players.jpg

48 Jamie C runs up to take the penalty while the ref watches the players.jpg

Click for large image

49_sadly_the_keeper_manages_to_save_it.jpg

49 sadly the keeper manages to save it.jpg

Click for large image

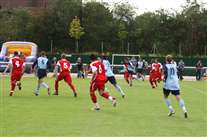
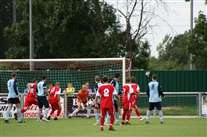
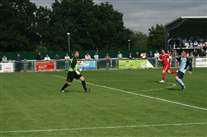
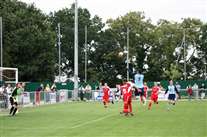
50_A_packed_penalty_area_in_the_closing_few_seconds.jpg

50 A packed penalty area in the closing few seconds.jpg

Click for large image

51_The_ball_comes_over__the_keeper_misses....jpg

51 The ball comes over, the keeper misses....jpg

Click for large image

52_..but_Jamie_doesn_t_2-1.jpg

52 ..but Jamie doesn't 2-1.jpg

Click for large image

53_Cue_the_celebrations.jpg

53 Cue the celebrations.jpg