Click for large image

1_Is_this_the_Basingstoke_No5.jpg

1 Is this the Basingstoke No5.jpg

Click for large image

2_Less_than_a_minute_gone.......jpg

2 Less than a minute gone.......jpg

Click for large image

3_...and_Basingstoke_go_1_up.jpg

3 ...and Basingstoke go 1 up.jpg

Click for large image

4_Lee_Burns.jpg

4 Lee Burns.jpg

Click for large image

5_Elliot_Bradbrook.jpg

5 Elliot Bradbrook.jpg

Click for large image

6_Ryno_picks_the_ball_up.....jpg

6 Ryno picks the ball up.....jpg

Click for large image

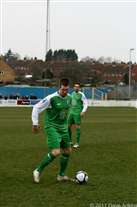
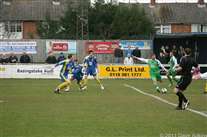
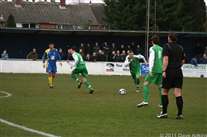
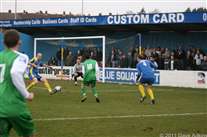
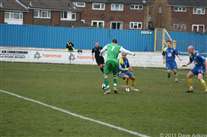
7_...confuses_the_defender_and_cuts_inside.....jpg

7 ...confuses the defender and cuts inside.....jpg

Click for large image

8_...._makes_himself_a_bit_of_room.....jpg

8 .... makes himself a bit of room.....jpg

Click for large image

9_...._and_shoots.....jpg

9 .... and shoots.....jpg

Click for large image

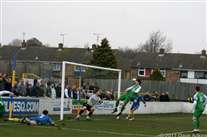
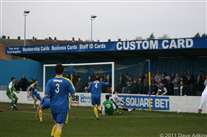
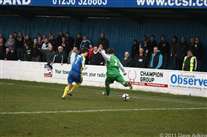
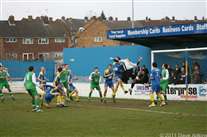
10_..._the_keepers_beaten_and_that_s_the_equalise_with_4_minutes_gone.jpg

10 ... the keepers beaten and that's the equalise with 4 minutes gone.jpg

Click for large image

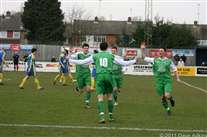
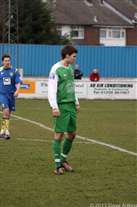
11_Just_incase_anyone_doesn_t_realise_who_the_scorer_is_Ryno_points_to_the_no_on_his_back.jpg

11 Just incase anyone doesn't realise who the scorer is Ryno points to the no on his back.jpg

Click for large image

12_Oh_Yes.jpg

12 Oh Yes.jpg

Click for large image

13_Ryno_CAN_cross_with_his_right_foot.jpg

13 Ryno CAN cross with his right foot.jpg

Click for large image

14_A_freekick_in_Ryno_territory.....jpg

14 A freekick in Ryno territory.....jpg

Click for large image

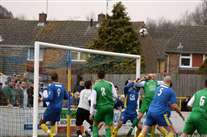
15_.....but_it_s_just_too_close_to_the_keeper.jpg

15 .....but it's just too close to the keeper.jpg

Click for large image

16_Tom_Bonner.jpg

16 Tom Bonner.jpg

Click for large image

17_Danny_Harris_dummies_as_Ryno_comes_in_to_take_the_freekick.....jpg

17 Danny Harris dummies as Ryno comes in to take the freekick.....jpg

Click for large image

18_....low_and_hard_through_the_wall.....jpg

18 ....low and hard through the wall.....jpg

Click for large image

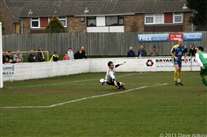
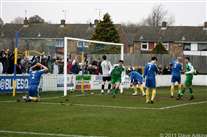
19_...the_keeper_s_beaten_but_the_post_isn_t.jpg

19 ...the keeper's beaten but the post isn't.jpg

Click for large image

20_....Tom_Bonner_runs_onto_the_rebound.....jpg

20 ....Tom Bonner runs onto the rebound.....jpg

Click for large image

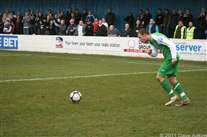
21_....gets_the_ball_back_into_the_centre....jpg

21 ....gets the ball back into the centre....jpg

Click for large image

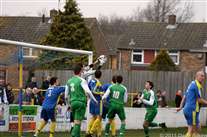
22_...Charlie_gets_his_head_to_the_ball.....jpg

22 ...Charlie gets his head to the ball.....jpg

Click for large image

23_...and_Danny_forces_it_home_2-1_Darts.jpg

23 ...and Danny forces it home 2-1 Darts.jpg

Click for large image

24_get_in_there.jpg

24 get in there.jpg

Click for large image

25_congrats_all_round.jpg

25 congrats all round.jpg

Click for large image

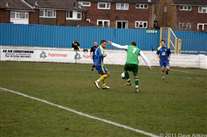
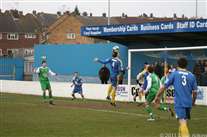
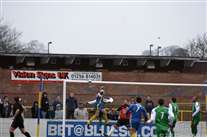
26_Danny_gets_an_arm_in_his_face_as_he_jumps.jpg

26 Danny gets an arm in his face as he jumps.jpg

Click for large image

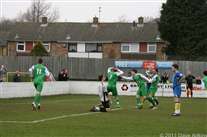
27_The_keeper_collects_safely_before_Charlie_can_jump.jpg

27 The keeper collects safely before Charlie can jump.jpg

Click for large image

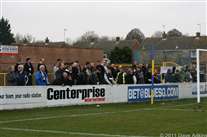
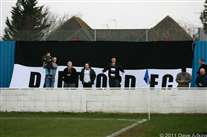
28_The_Darts_supporters_being__watched__by_a_Basingstoke_steward.jpg

28 The Darts supporters being 'watched' by a Basingstoke steward.jpg

Click for large image

29_Danny_Harris.jpg

29 Danny Harris.jpg

Click for large image

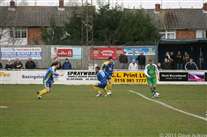
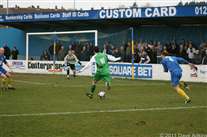
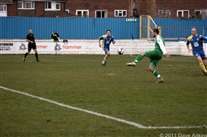
30_The_Basingstoke_forward_hits_it_hard......jpg

30 The Basingstoke forward hits it hard......jpg

Click for large image

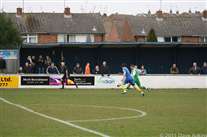
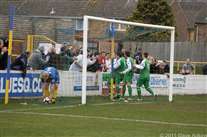
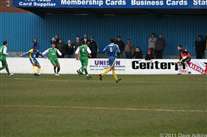
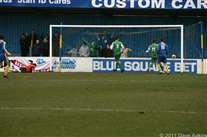
31_...and_Andy_is_beaten_for_a_second_time_2-2.jpg

31 ...and Andy is beaten for a second time 2-2.jpg

Click for large image

32_the_immense_home_support_celebrate.jpg

32 the immense home support celebrate.jpg

Click for large image

33_The_No5_tries_to_get_Danny_s_shirt.jpg

33 The No5 tries to get Danny's shirt.jpg

Click for large image

34_Tom_Bonner_outjumps_the_forward_to_head_clear.jpg

34 Tom Bonner outjumps the forward to head clear.jpg

Click for large image

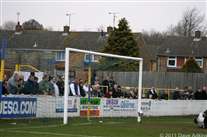
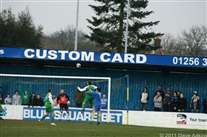
35_Somewhere_to_hang_Flagzilla_in_the_2nd_half.jpg

35 Somewhere to hang Flagzilla in the 2nd half.jpg

Click for large image

36_Danny_runs_into_the_area......jpg

36 Danny runs into the area......jpg

Click for large image

37_...forces_an_error_from_the_no5....jpg

37 ...forces an error from the no5....jpg

Click for large image

38_...and_almost_slots_it_home.jpg

38 ...and almost slots it home.jpg

Click for large image

39_Ryno_collects_the_ball_in_the_middle_of_the_area.....jpg

39 Ryno collects the ball in the middle of the area.....jpg

Click for large image

40....controls_it.....jpg

40....controls it.....jpg

Click for large image

41_...and_shoots__but_it_s_over_the_bar.jpg

41 ...and shoots, but it's over the bar.jpg

Click for large image

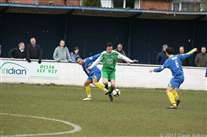
42_Matt_Jones_gets_to_the_byline_and_crosses.jpg

42 Matt Jones gets to the byline and crosses.jpg

Click for large image

43_Ryno_steadies_himself_before_sending_the_freekick_over......jpg

43 Ryno steadies himself before sending the freekick over......jpg

Click for large image

44_....for_Elliot_to_head_back_across_the_area.....jpg

44 ....for Elliot to head back across the area.....jpg

Click for large image

45_...but_the_no4_gets_a_head_to_it_before_it_falls_for_Tom_Champion.jpg

45 ...but the no4 gets a head to it before it falls for Tom Champion.jpg

Click for large image

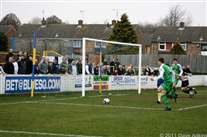
46_The_keeper_punches_Ryan_s_freekick_clear.jpg

46 The keeper punches Ryan's freekick clear.jpg

Click for large image

47_Charlie_Sheringham.jpg

47 Charlie Sheringham.jpg

Click for large image

48_Danny_Harris.jpg

48 Danny Harris.jpg

Click for large image

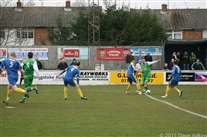
49_The_no5_out_jumps_Matt_Jones_and_heads_it_goalward.....jpg

49 The no5 out jumps Matt Jones and heads it goalward.....jpg

Click for large image

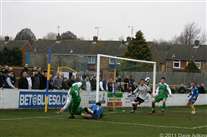
50_...Andy_s_beaten_but_it_hits_the_crossbar.jpg

50 ...Andy's beaten but it hits the crossbar.jpg